How to allow any user to turn on/off 2FA by email for their user account
Two-factor authentication (2FA) is one of the best ways to secure account access. It presents an extra obstacle, another layer of complexity to unauthorized account access.
Shield Security has integrated easy-to-use two-factor authentication (2FA) by email. You have the ability to
- Enforce email-2FA for your users ; or
- allow any user to turn it on/off for their user account.
How to allow user to turn on/off 2FA by email for their user account
Before you perform the steps outlined here, you must ensure that email-2FA system for your WordPress site is enabled.
Once the system has been enabled, you'll need to turn on 'Allow Any User' option accessible from within the main sidebar menu > Configure > Login > Email Authentication.
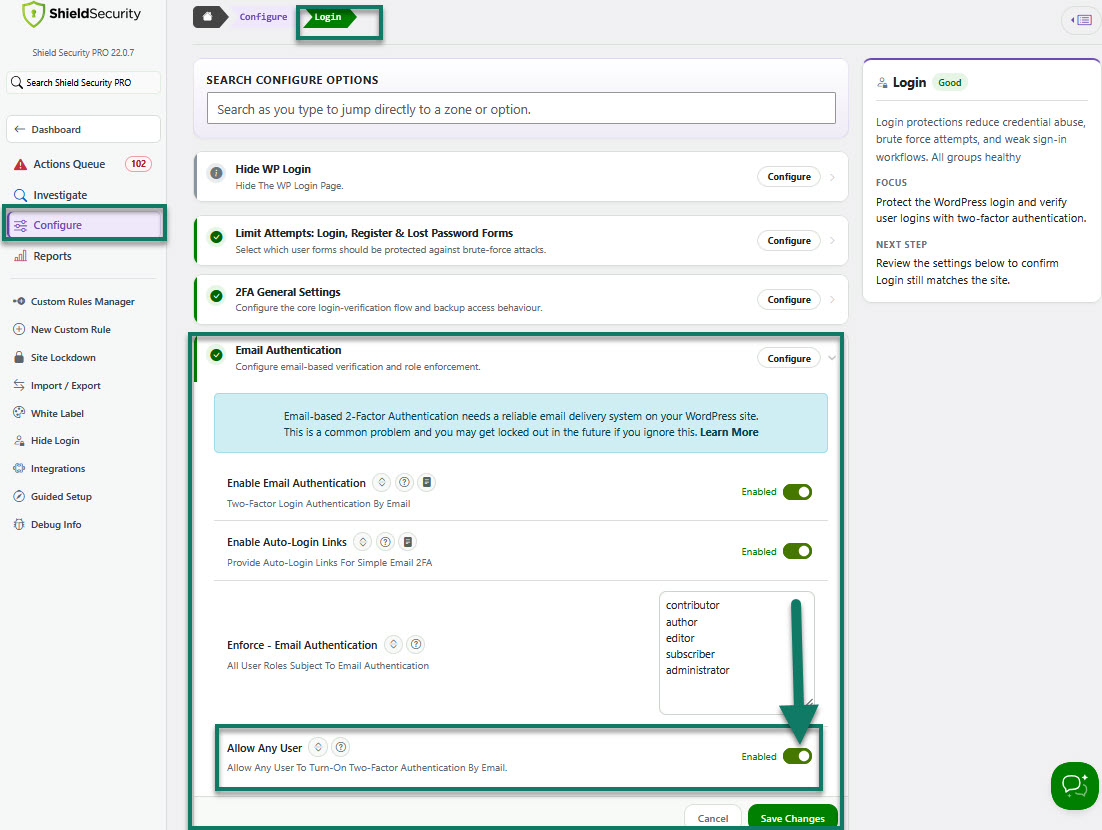
Once you've done this, the particular user role will have the ability to turn on/off email-2FA for their user account.
Example
We'd like to allow our site subscribers to decide whether they want to use email-2FA or not.
So, the first step we need to do is to turn on 'Allow Any User' option (as explained above) and then remove the 'subscriber' user role from the 'Enforce - Email Authentication' list. (see the screenshot below)
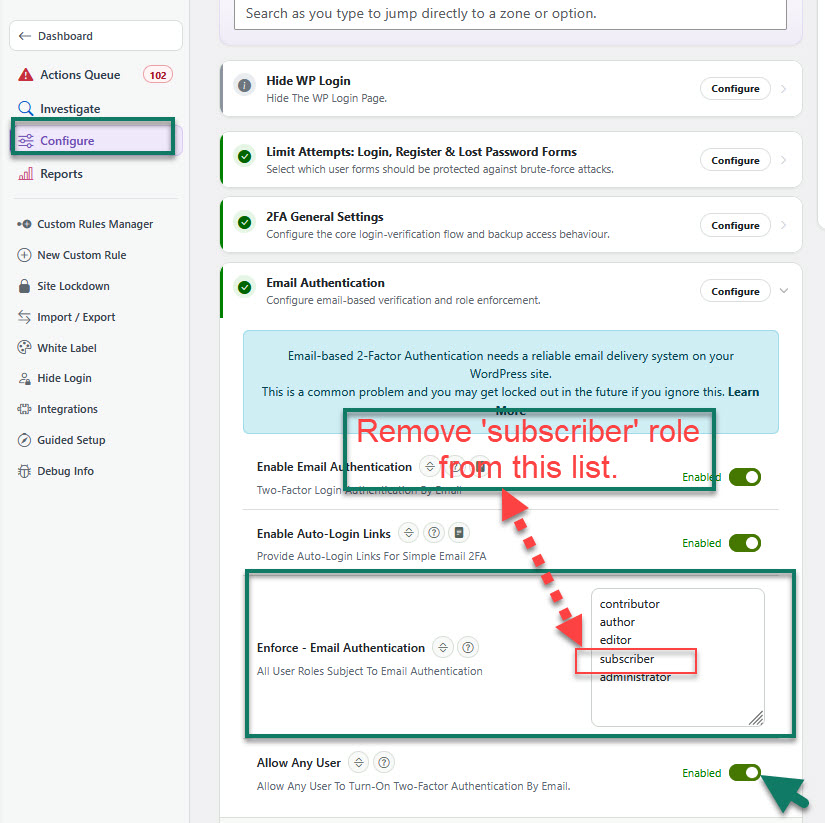
Important: If you leave 'subscriber' user role on the list, they'll be enforced for email-2A. This means that they'll not have the ability to decide whether they want to use it for their user account or not.
Once you have this set, your site subscribers can go to their Profile or Login Security page and turn on/off email-2FA for their user account by checking/unchecking the email-2FA checkbox.
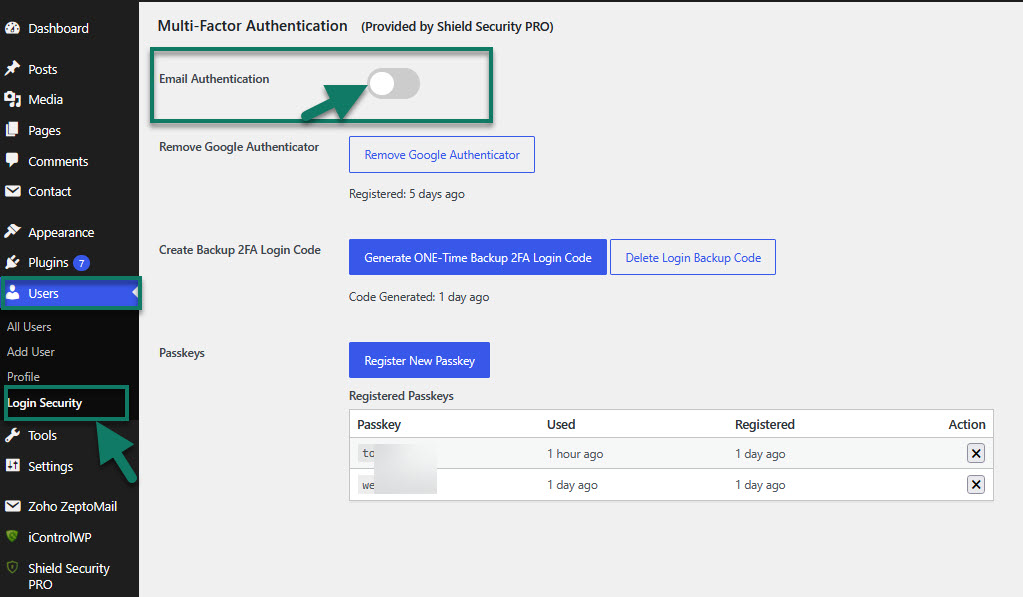
If they want to use email-2FA for their user account, they'll need to check the 'Email Authentication' checkbox from their profile and click to save.
Or, they can do this from within the User 2FA Setup Page.
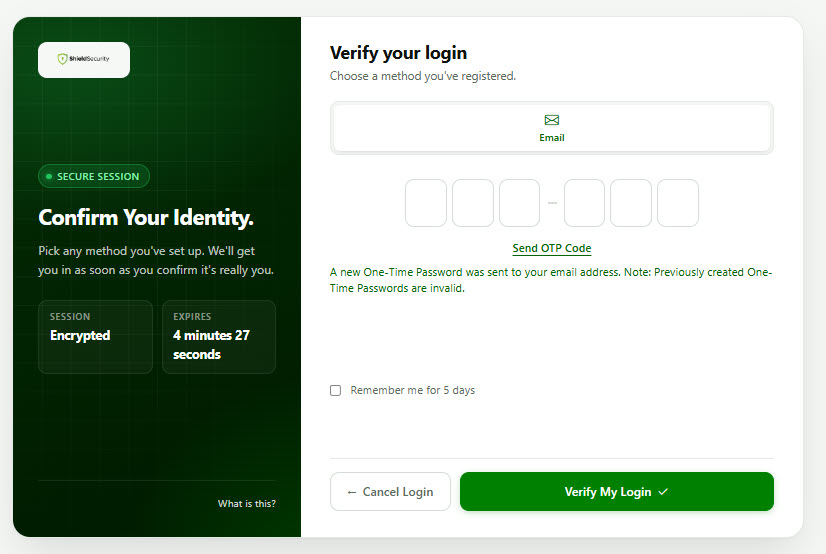
Next time they try to login, they'll be presented with the OTP window and prompted to verify their identity with the email-2FA code. (see the screenshot below)
If they don't want to use email-2FA for their user account, they can leave 'Email Authentication' checkbox unchecked (see the screenshot above).
Note: ShieldPRO is required for this feature. To find out what the extra ShieldPRO features are and how to purchase, please follow this link here.